
Lew MDI O-Ball - Indications & Solutions
Lew MDI - Indications & Solutions
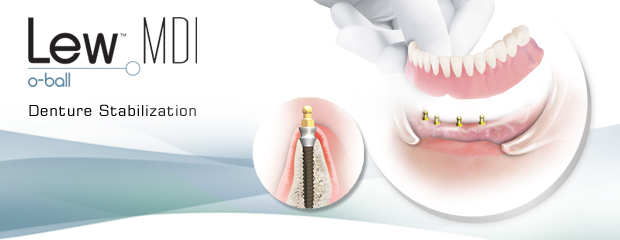
Lew MDI is a versatile and minimally invasive system aimed at solving certain implant situations in a simplified and cost and time effective manner both for the practitioner and the patient.
Lew MDI is not meant as a replacement for conventional implantology but as a complement. The main indication for the use of the Lew MDI Mini Dental Implant system is for the stabilization of a denture in an edentulous mandible or maxilla.
Edentulous Mandible
A minimum of 4 implants should be placed in the mandible for a total denture restoration.
- Use a ridge mapping caliper to determine the width of the mandible to ensure that the chosen mini implant is wide enough.
- The two most distal implant locations will be determined by locating the mental foramen and moving a minimum of 7 mm towards the anterior of the mandible. Use a skin marker to designate these two locations.
- The locations of the two most anterior implants will be determined evenly spacing them between the most distal implants.
- At each implant site, a 1.5mm tissue punch should be used to remove tissue to the cortical bone.
- A pilot hole is then created at each site to give a minimum depth that allows for auto advancement of the implant into the bone. (The drill depth should not exceed one-third to one-half the threaded length of the chosen MDI.)
- The drill sequence will depend on the density of the bone at each site.
- For the 2.0mm implant start with the marking drill followed by the 1.2 mm surgical drill in Type II bone. In Type I bone, a 1.5 mm drill is also recommended.
- For the 2.5 mm implant in Type II bone, the marking drill will be followed by the 1.2 mm and 2.0 mm surgical drills. In Type III bone, the marking drill is followed by the 1.5 mm drill.
- After the creation of the pilot hole, the implant can be carried over to the patient’s mouth utilizing the implant vial cap. Carefully insert the implant into the prepared pilot hole with downward pressure to ensure proper engagement of bone. The vial cap should only be used for a few turns until resistance is met with the bone.
- Replace the vial cap with the multipurpose driver and continue placement until finger resistance becomes noticeable.
- Once adequate resistance is obtained, the Park Dental Continuous Feedback Torque Wrench can be placed over the top of the Multipurpose Driver. Applying downward force upon the head of the wrench, place your thumb under the patient’s jaw and forefinger over the head of the torque wrench. Slowly turn the torque wrench. Continue placing the implant until a minimum of 35Ncm of resistance is met and only the square and o-ball portion of the implant is above tissue level.
- Blockout shims should then be placed over the square portion of the implant to prevent locking the denture in the mouth. The blockout shim should not prevent the snapping of a metal housing onto each implant head.
- Place a metal housing on the head of each implant.
- Check the seating of the denture to ensure that plenty of room has been created within the denture for each housing. Further relieve any necessary areas until a passive seating is achieved.
- Fill the relieved area of the denture with JUELL Cure Hard reline material and place the denture back in the patient’s mouth. Have the patient hold in light occlusion for 7 to 9 minutes while the material sets.
- Once the material is set, remove, clean, and polish the denture.
Patients will appreciate your ability to give them back their ability to speak, talk and laugh.
Edentulous Maxilla
A minimum of 6 implants should be placed in the maxilla for a total denture restoration.
- Use a ridge mapping caliper to determine the width of the maxilla to ensure that the chosen mini implant is wide enough.
- Always make sure to avoid important anatomic landmarks and use a skin marker to define implant locations on the ridge.
- At each implant site a 2.0 mm tissue punch should be used to remove tissue to the cortical bone.
- The pilot hole is then created to give a minimum depth that allows for auto advancement of the implant into the bone. (The drill depth should not exceed one-third to one-half the threaded length of the chosen MDI.)
- The drill sequence will depend on the density of the bone at each site.
- For the 2.5 mm implant in Type II bone, the marking drill will be followed by the 1.2 mm and 2.0 mm surgical drills. In Type III bone, the marking drill is followed by the 1.5 mm drill.
- After the creation of the pilot hole, the implant can be carried over to the patient’s mouth utilizing the implant vial cap. Carefully insert the implant into the prepared pilot hole with downward pressure to ensure proper engagement of bone. The vial cap should only be used for a few turns until resistance is met with the bone.
- Replace the vial cap with the multipurpose driver and continue placement until finger resistance becomes noticeable.
- Once adequate resistance is obtained, the Park Dental Continuous Feedback Torque Wrench can be placed over the top of the Multipurpose Driver. Applying downward force upon the head of the wrench, place your thumb under the patient’s jaw and forefinger over the head of the torque wrench. Slowly turn the torque wrench. Continue placing the implant until a minimum of 35Ncm of resistance is met and only the square and o-ball portion of the implant is above tissue level.
- Because maxillary bone is often less dense than that found in the mandible, it is recommended that the metal housings not be immediately loaded. Instead perform a soft reline using JUELL Cure Soft and allow 4 to 6 months for the implants to osseointegrate.
- Once osseointegration has occurred you can remove the JUELL Cure Soft Reline from the denture.
- Blockout shims should then be placed over the square portion of the implant to prevent locking the denture in the mouth. The blockout shim should not prevent the snapping of a metal housing onto each implant head.
- Place a metal housing on the head of each implant.
- Check the seating of the denture to ensure that plenty of room has been created within the denture for each housing. Further relieve any necessary areas until a passive seating is achieved.
- Fill the relieved area of the denture with JUELL Cure Hard reline material and place the denture back in the patient’s mouth. Have the patient hold in light occlusion for 7 to 9 minutes while the material sets.
- Once the material is set, remove, clean, and polish the denture.
Patients will appreciate your ability to give them back their ability to speak, talk and laugh.
Highest Quality

Park Dental Research is committed to using the highest quality development, production and innovation standards available.